Migrating a WordPress website from one hosting provider to another can feel risky—especially when uptime, SEO rankings, and user experience are critical. The good news is that with the right approach, you can achieve absolute zero downtime while keeping the same domain.
This guide walks you through a proven method that ensures your visitors never experience interruptions during the migration.
✅ Why Zero Downtime Migration Matters
- Prevents loss of traffic and revenue
- Protects SEO rankings
- Maintains user trust and accessibility
- Avoids broken sessions or incomplete transactions
🧰 Prerequisites
Before you begin, ensure you have:
- Access to current hosting (source server)
- Access to new hosting (target server)
- Domain registrar/DNS management access
- A local computer (laptop/desktop)
- WordPress admin credentials
- The Duplicator plugin
🔄 Step-by-Step Zero Downtime Migration Process
🚀 WordPress Migration Checklist
1. Reduce DNS TTL (Time to Live)
Before making any changes, lower the TTL of your domain’s A record.
- Go to your DNS provider.
- Set TTL to the lowest possible value (e.g., 300 seconds / 5 minutes).
✅ This ensures DNS changes propagate quickly later.
⚠️ Do this at least a few hours before migration (ideally 24 hours).
2. Prepare the New Hosting Environment
- Add your domain name to the new hosting provider.
- Install a fresh WordPress instance on the new server.
At this point, your domain still points to the old hosting.
3. Edit Your Local Hosts File
This is the key to zero downtime.
Update your computer’s hosts file so only your local machine resolves the domain to the new server.
Example:
123.45.67.89   yourdomain.com
123.45.67.89   www.yourdomain.com
Replace 123.45.67.89 with your new hosting IP address.
📍 Hosts file locations:
- Windows:
C:\Windows\System32\drivers\etc\hosts - macOS/Linux:
/etc/hosts
✅ Now, when you visit your domain from your computer, you’ll see the new hosting site, while the rest of the world still sees the old one.
4. Create a Backup Using Duplicator Plugin
On your old hosting:
- Install and activate the Duplicator plugin
- Create a new package:
- Archive (website files + database)
- Installer file
- Download:
installer.php- Archive
.zipfile
5. Upload Backup to New Hosting
On the new hosting server:
- Upload both files to your domain’s root directory (e.g.,
public_html)
6. Run the Duplicator Installer (Locally)
Because of the hosts file change, you can use your domain directly:
https://yourdomain.com/installer.phpComplete the installation:
- Extract files
- Set up database credentials
- Run deployment
✅ Your migrated site is now fully running on the new server—but only visible to you.
7. Test Thoroughly
Before going live, verify:
- Pages load correctly
- Images and media work
- Plugins function properly
- Forms and login work
- Performance is acceptable
✅ Fix any issues before proceeding.
8. Update DNS A Record
Now it’s time to go live.
- Go to your DNS provider
- Update the A record to point to the new hosting IP
✅ Because TTL was reduced earlier, propagation will happen quickly.
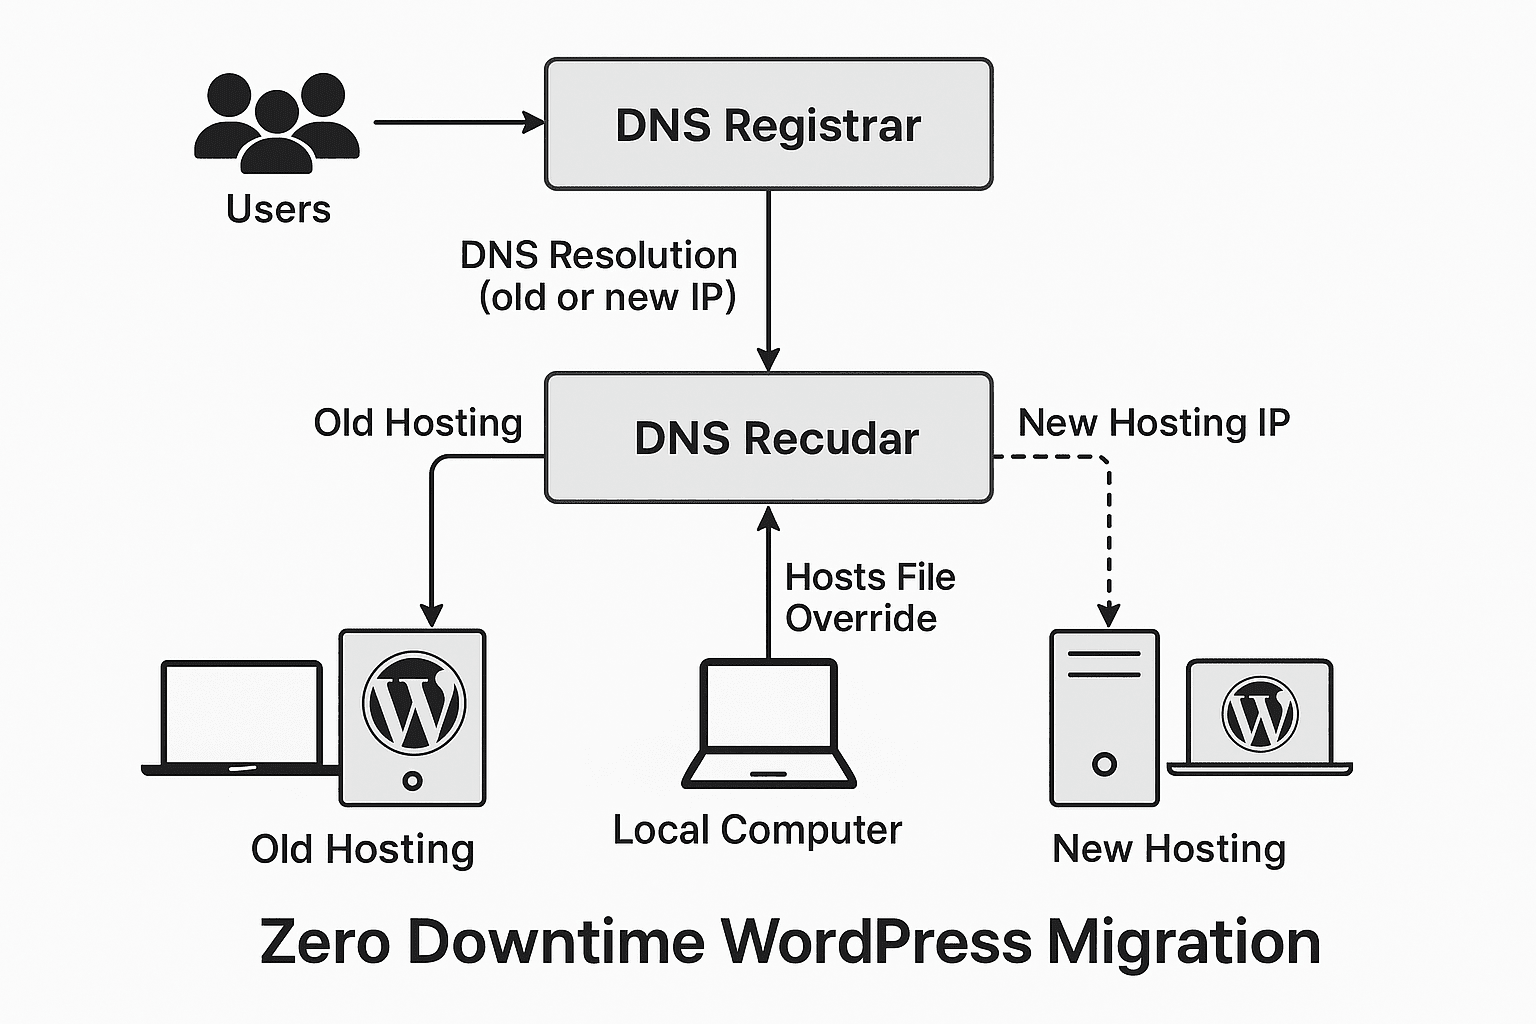
9. Zero Downtime in Action
- Visitors whose DNS hasn’t updated yet → still see old hosting
- Visitors with updated DNS → see new hosting
✅ No downtime occurs — the site is always available.
10. Monitor Transition
Over the next few hours:
- Traffic gradually shifts to the new server
- No disruption to users
11. Clean Up Old Hosting
After about 5–7 days (once you’re confident DNS propagation is complete):
- Remove the WordPress installation from old hosting
- Cancel hosting if no longer needed
🔐 Pro Tips for a Smooth Migration
- Disable caching during testing
- Avoid updating content during migration
- Use maintenance mode only if necessary (usually not needed here)
- Take a second backup just before migration
🧾 Summary
This method guarantees zero downtime by:
- Lowering DNS TTL early
- Setting up the new environment independently
- Using the hosts file for private testing
- Migrating with Duplicator
- Switching DNS only after full validation
✅ Result: seamless migration with no interruptions
✅ Need Help?
Need Help with Migration?
If you’d prefer a hassle-free, zero downtime WordPress migration done for you, feel free to contact us at admin@core365.cloud.